|

How to Make Handmade Paper
This paper making recipe will help you recycle some of that wasted paper around your house such as: newsprint, envelopes, writing paper, left over gift wrap or other types of paper. Note: Sort the paper by color, because the final paper it will come out that tone.
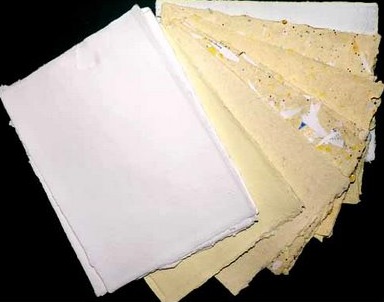 Great Fall Project! Try adding natural items such as Autumn leaves, Small flowers, bits of Pine needles and berries to the mix for beautiful texture and color papers. Lint from clothes-dryer is an ideal paper fodder. You can even use bits of foil (from leftover holiday paper and labels) and colored threads also add a special touch. Many shredded things will work. Do use these specialty items sparingly, otherwise the piece of paper won't hold together. Great Fall Project! Try adding natural items such as Autumn leaves, Small flowers, bits of Pine needles and berries to the mix for beautiful texture and color papers. Lint from clothes-dryer is an ideal paper fodder. You can even use bits of foil (from leftover holiday paper and labels) and colored threads also add a special touch. Many shredded things will work. Do use these specialty items sparingly, otherwise the piece of paper won't hold together.
Just use your imagination!
Follow these simple directions:
1. Materials You Need:
- A large bowl
- Waste paper (about 5 sheets)
- Water
- A mixer or food processor
- Two wooden frames 8"-12" (you can buy a standard frame or make one)
- A screen (nylon works well and you can bu it at a hardware and dept store)
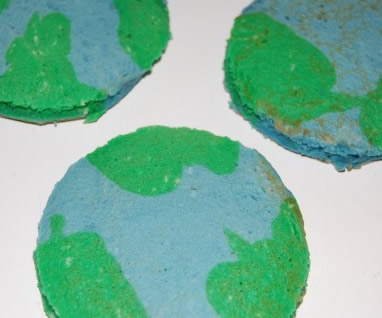
Paper Making Recipe and Food Coloring
Make a paper Earth.
|
- A stapler
- A large Tub (dishpan for instance)
- Cloth
- An iron
- Optional, dryer Lint, thread,glitter, flowers, thin leaves, pine needles,potato or carrot peel...be creative here.
2. Soak It
To begin, shred the paper into small squares about 1 inch and put them into the bowl with hot water. Let soak for half an hour.
3. Make A Mold
While the paper is soaking, make the mold
Attach the screen to each frameusing staples
Leave the other frame blank.
(You can also make molds from screens, or other objects (see below)
4. Turn It Into Pulp
Place the soaked paper in the mixer bowl or food processor half filled with water. Mix at half speed until smooth
-At this point, you can also add small quantities of vegetables or plants to the pulp. In this case, mix until the mixture is uniform. (Only a small amount should be used or you will end up with mush)
-To add color to the paper , add nontoxic fabric dye or food coloring to the mixture.
5. Swish It In a Tub
Pour warm water into the tub until it is half full. Then, pour the pulp into the tub until the mixture resembles thick soup.The thicker the mixture, the thicker your paper will be. Place the frame in and Shake it from side to side to distribute the pulp evenly until it makes a sheet of paper.
6. Drain, Place It In a Mold
Take thepaper pulp and frame out of the tub. The other border frame on top. Hold both frames and turn the paper 180 degrees on to the clean frame.
7. Let It Dry
Place the frames horizontally and let it drip dry, or turn it over onto a cloth to dry
8. Iron It
Place another cloth on top. Dry the paper by ironing firmly. Remove the cloth or letting it dry naturally
9. Using Other Kinds of Molds
You can try other ideas like using baking molds, plastic, plaster or candy molds. This can be fun for ornaments, small gift tags, or wall ornaments. Spray the mold with PAM. Place the damp paper into a mold and let it dry-it should lift out when dry. To hang it add a string while it is wet. *this may take practice.
10. Left Overs
When you are done, you can throw away the screened pulp or keep the drained, leftover pulp in the freezer, in a plastic bag, for later use. NOTE: Do not pour the pulp into the sink or toilet because the pulp could block the drain.
Remember use your imagination to make this project fun. What natural materials can you use with yor recipe? Go to the art store and look at Handmade Papers for even more ideas!
Additional info and link with Photographs
Dryer Lint Crafts
Exclusive Planetpals
Dryer lint clay, Paper Mache and Paper! Three recipes
.
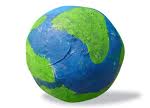
Paper Mache Recipes and Patterns:
Exclusive Planetpals Three Patterns! Make the Planetpal, the world, or a Santa Ornament in Paper Mache.
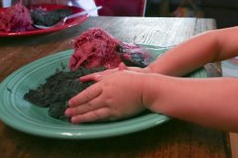
Make Natural Dyes Great for for Play Dough and Other Crafts...How to use Rose Petals, Beetroot, Blueberries, Tumaric and Bark as natural dye

Paper Making Recipe
Exclusive Planetpals
Learn how to make paper for many thing from scrap paper and discards and recycle.

Back to the crafts page
|